Install & setup
Run Labcat on your computer with Docker. The default uses a prebuilt native Labcat application, so you do not compile the desktop shell yourself.
1. Prepare your computer
Install Git and start Docker Desktop on Mac or Windows. Windows must use Linux containers. On Linux, install Docker Engine and the Compose plugin. Use a local Docker context and an internet connection.
In Terminal or PowerShell, check:
git --version
docker info
docker compose version
The default native app and Browser mode need no host Python, Node or Rust. Only building the native application from source (option 3) needs desktop build prerequisites. See all system requirements before building.
2. Download and build
Run in your chosen installation folder:
git clone https://github.com/kewh5868/labcat.git
cd labcat
docker build -t labcat:0.1.0.dev0 .
Wait for a successful build; downloading dependencies can take several minutes.
3. Open the application
From the same folder:
| Mac / Linux | Windows PowerShell |
|---|---|
./labcat.sh |
.\labcat.cmd |
Choose a launch mode:
- Native Labcat app (Docker backend, default): press Enter to install/open the prebuilt native Labcat app and start its Docker backend. No Node, Rust or compiler is needed. The launcher downloads and verifies the pinned native shell for your supported platform; see prebuilt availability.
- Browser: open Labcat in your normal default browser.
- Build desktop application from source: compile and install the same native app locally. A prerequisite report first shows which build requirements are met or missing. Resolve missing items or select another launch mode.
All three use the Docker image built in step 2. The launcher remembers your
choice. To choose again, use ./labcat.sh --choose or .\labcat.cmd -Choose.
If the native download is unavailable or unsupported on your platform, the
launcher explains the problem; choose Browser or explicitly build from source.
The workspace opens with a setup dialog. Keep Docker running during setup and
research; ordinary launches do not need a rebuild.
Open Labcat again
Start Docker first. For either native option, open Labcat from your
applications menu. To reopen from this folder, use ./labcat.sh or
.\labcat.cmd for the remembered mode, or choose explicitly:
| Mode | Mac / Linux | Windows PowerShell |
|---|---|---|
| Prebuilt native app | ./labcat.sh --docker |
.\labcat.cmd -Docker |
| Browser | ./labcat.sh --browser |
.\labcat.cmd -Browser |
| Source-installed native app | ./labcat.sh --desktop |
.\labcat.cmd -Desktop |
The source-installed app is reused; it is not compiled on every launch.
Closing a window leaves the containers running. To stop them without deleting
saved work, use ./labcat.sh stop or .\labcat.cmd stop. Restart by running
the same open command again. See reopen and status details.
4. Connect your model
The developer recommends ChatGPT account sign-in, the most thoroughly tested connection in Labcat. Your account needs Codex access and available usage allowance. Other providers have their own model access and billing requirements.
If Labcat reports exhausted credits or usage allowance, rewriting the question will not restore access. Open Connections to check usage or choose another account or model; otherwise restore credits with your provider or wait for an allowance reset. Your question remains in the draft. A temporary rate limit is a separate condition. When a provider does not supply a reliable error category, Labcat reports that the model could not finish the assessment rather than claiming that your account has no credits.
- Under Model provider, select ChatGPT · account sign-in.
- Click Sign in with ChatGPT, finish authorization on the provider's page, and return to Labcat. Your password belongs on the provider's page.
- Wait for Connected, then select an available Model.
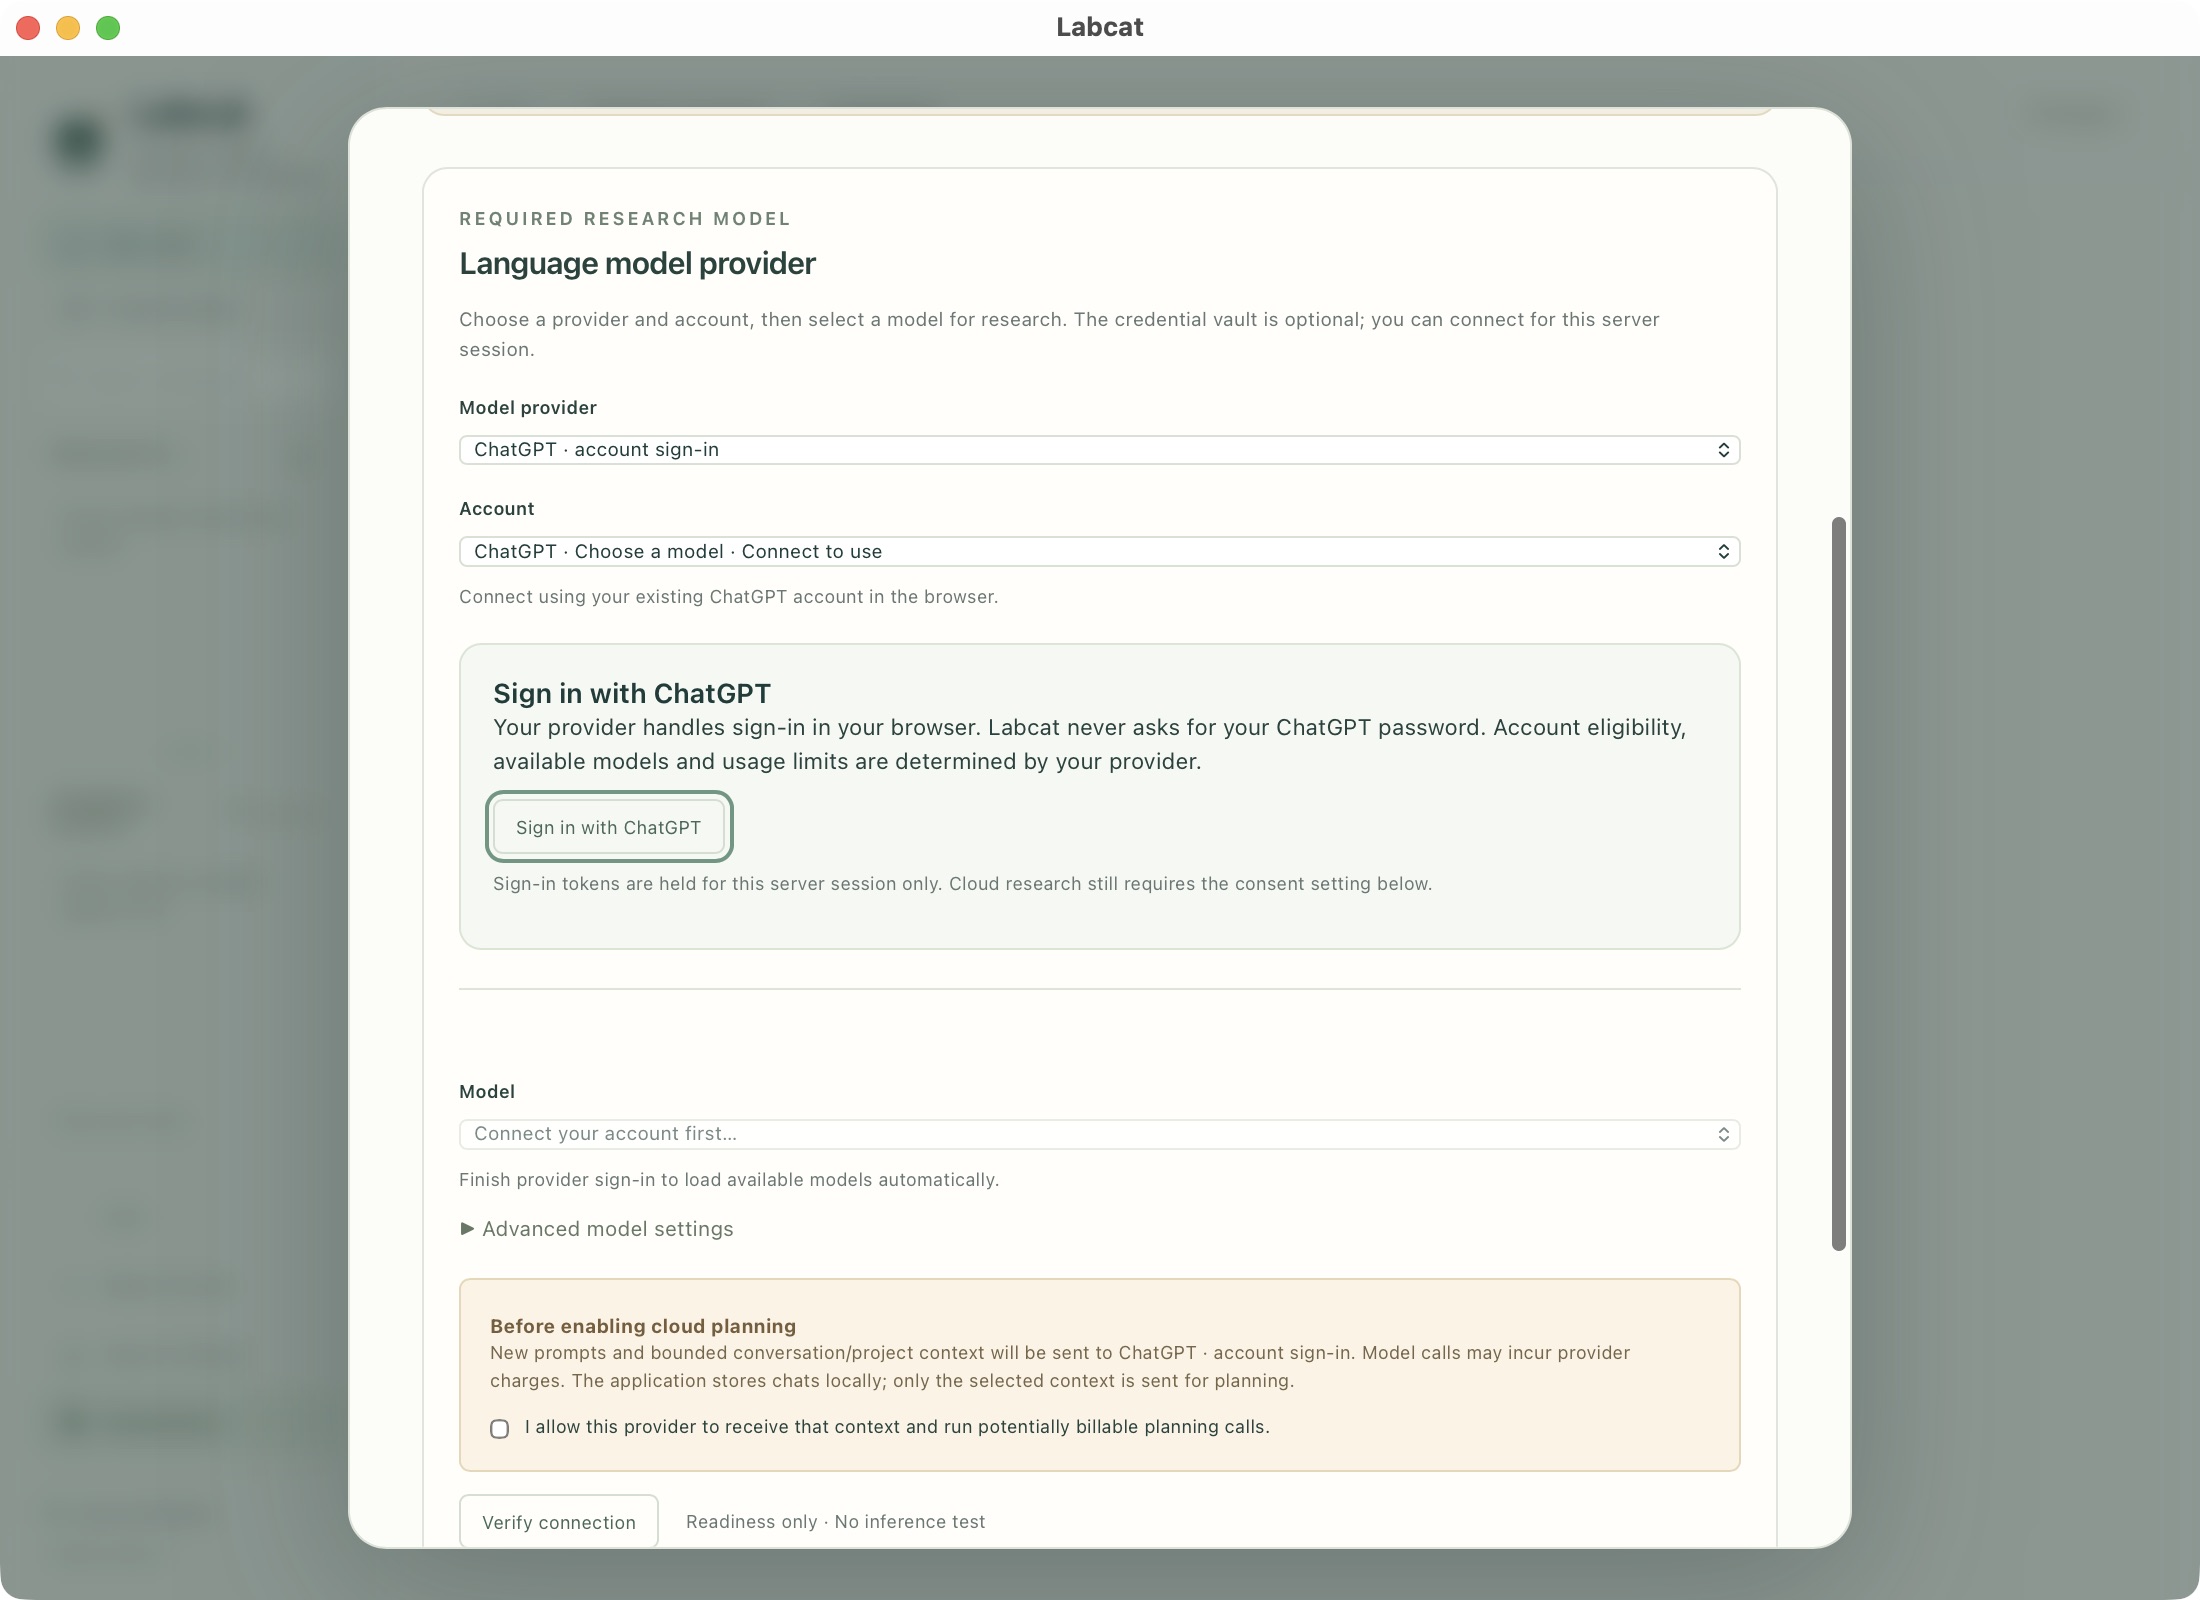
1. Choose the model provider. 2. Start provider sign-in. 3. Select a model after connection.
Before sign-in. Model choices load after the account connects.
Then save the connection:
- Read and enable the consent checkbox for sending research context to your provider.
- Click Save and test connections. After verification, click Continue. A saved connection may offer Verify and continue instead.
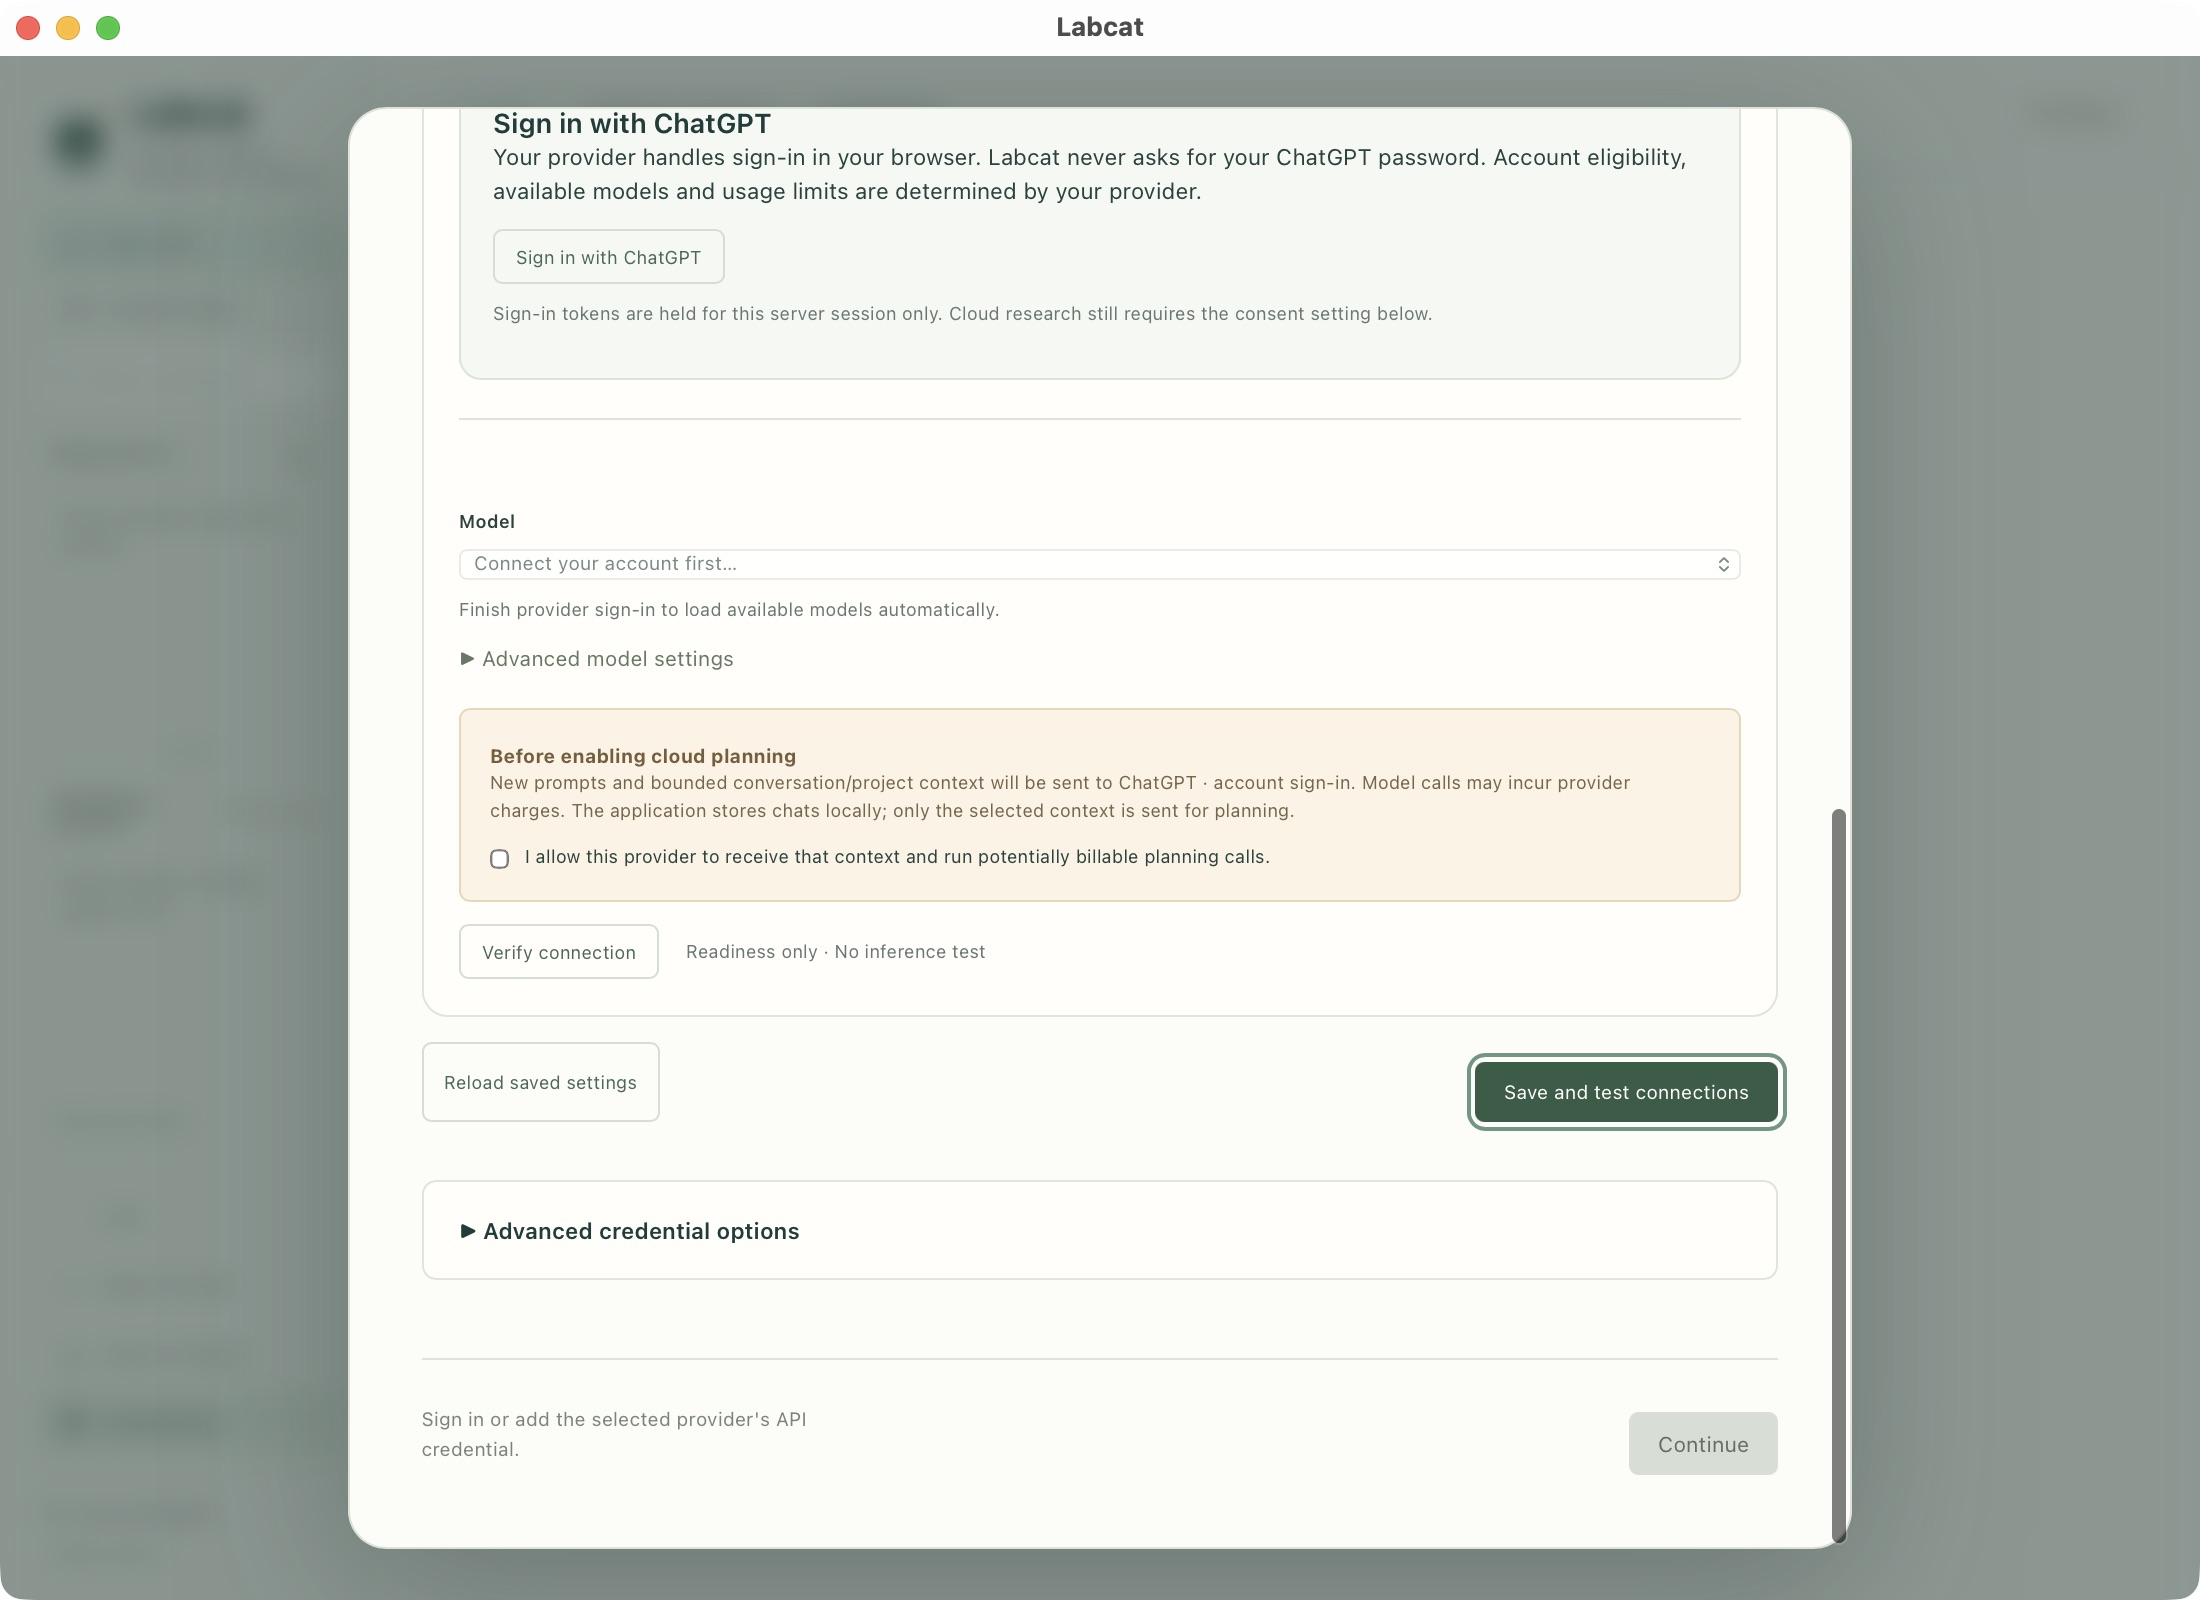
1. Consent to sending research context. 2. Save and test connections. 3. Continue once ready.
Continue remains unavailable until the required connection is ready. This readiness check does not run a research query.
The credential vault is optional. Session credentials work without a vault; encrypted storage can remember supported credentials between server sessions. Saved key values are never displayed back in the browser.
5. Choose sources and finish
In Public sources, keep the default sources for a first run. Optionally enter a Materials Project API key on its card and select Save and verify. The card is also in Connections.
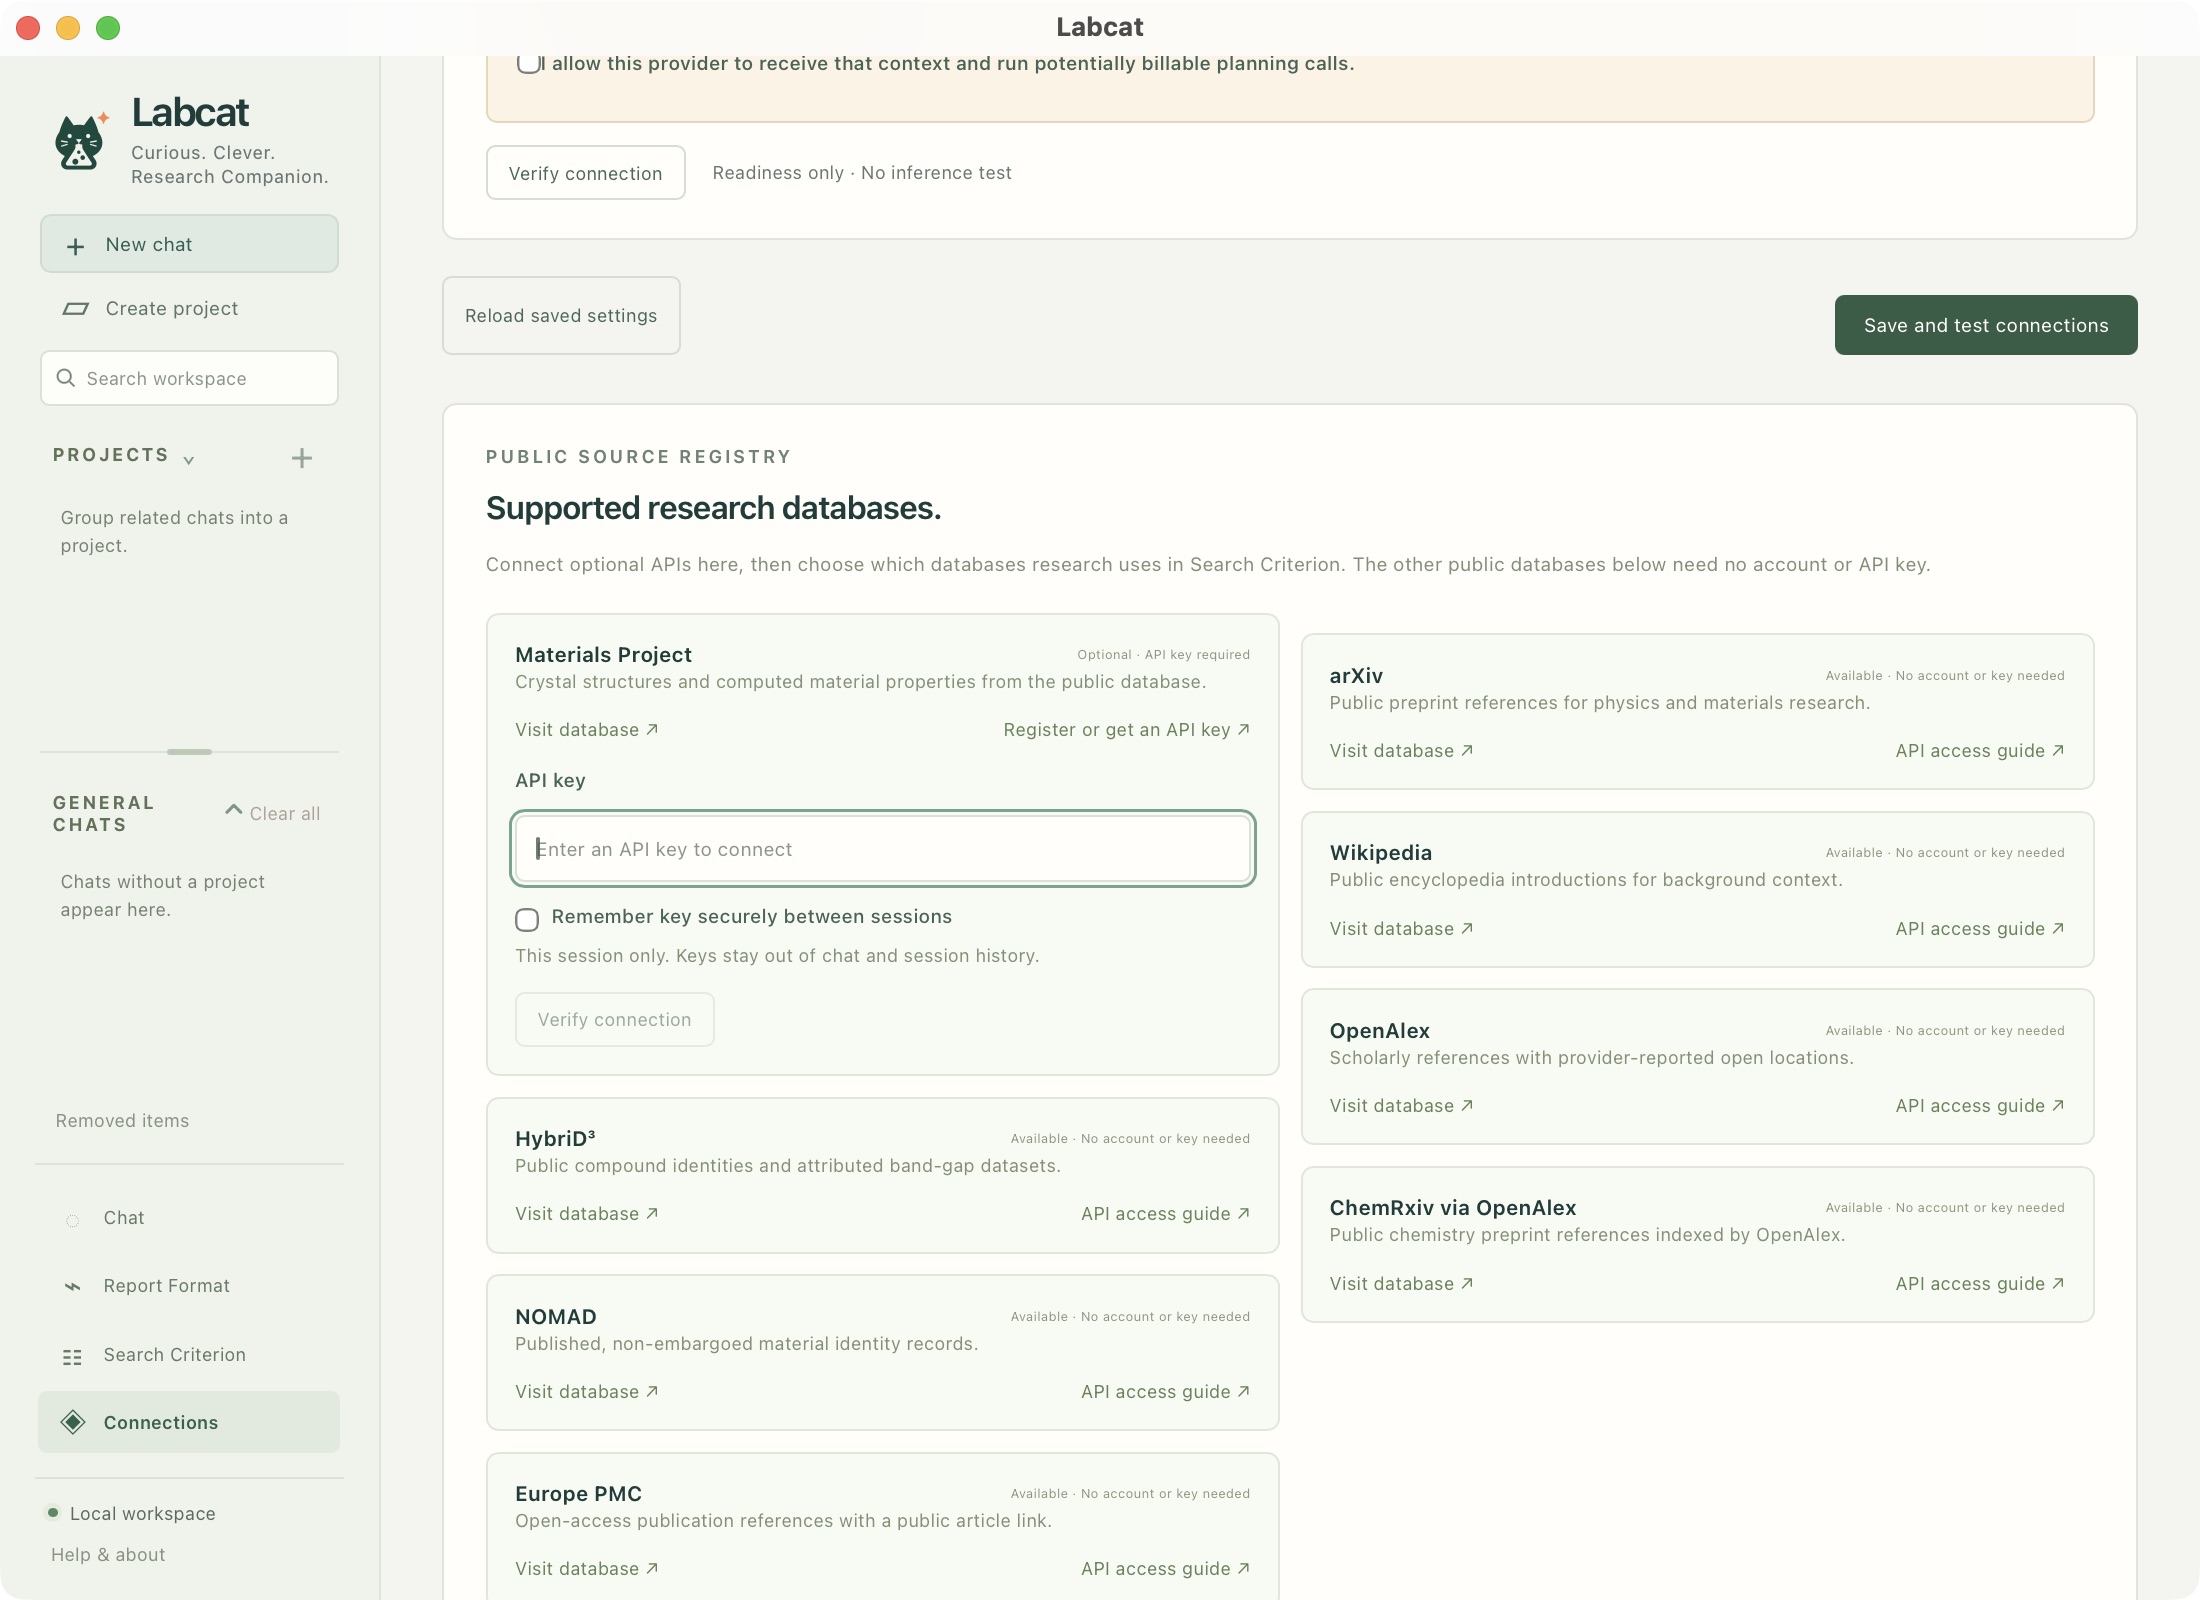
1. Get a Materials Project key. 2. Enter the key. 3. Verify the connection. This card is shown on Connections.
Choose Continue, then Finish setup on the Ready step. See Sources & methods for each connected repository and its access requirements. Anonymous sources remain available without a Materials Project key.
6. Ask a question
Choose New chat in the sidebar. Create project groups related chats; the user guide shows the project workflow.
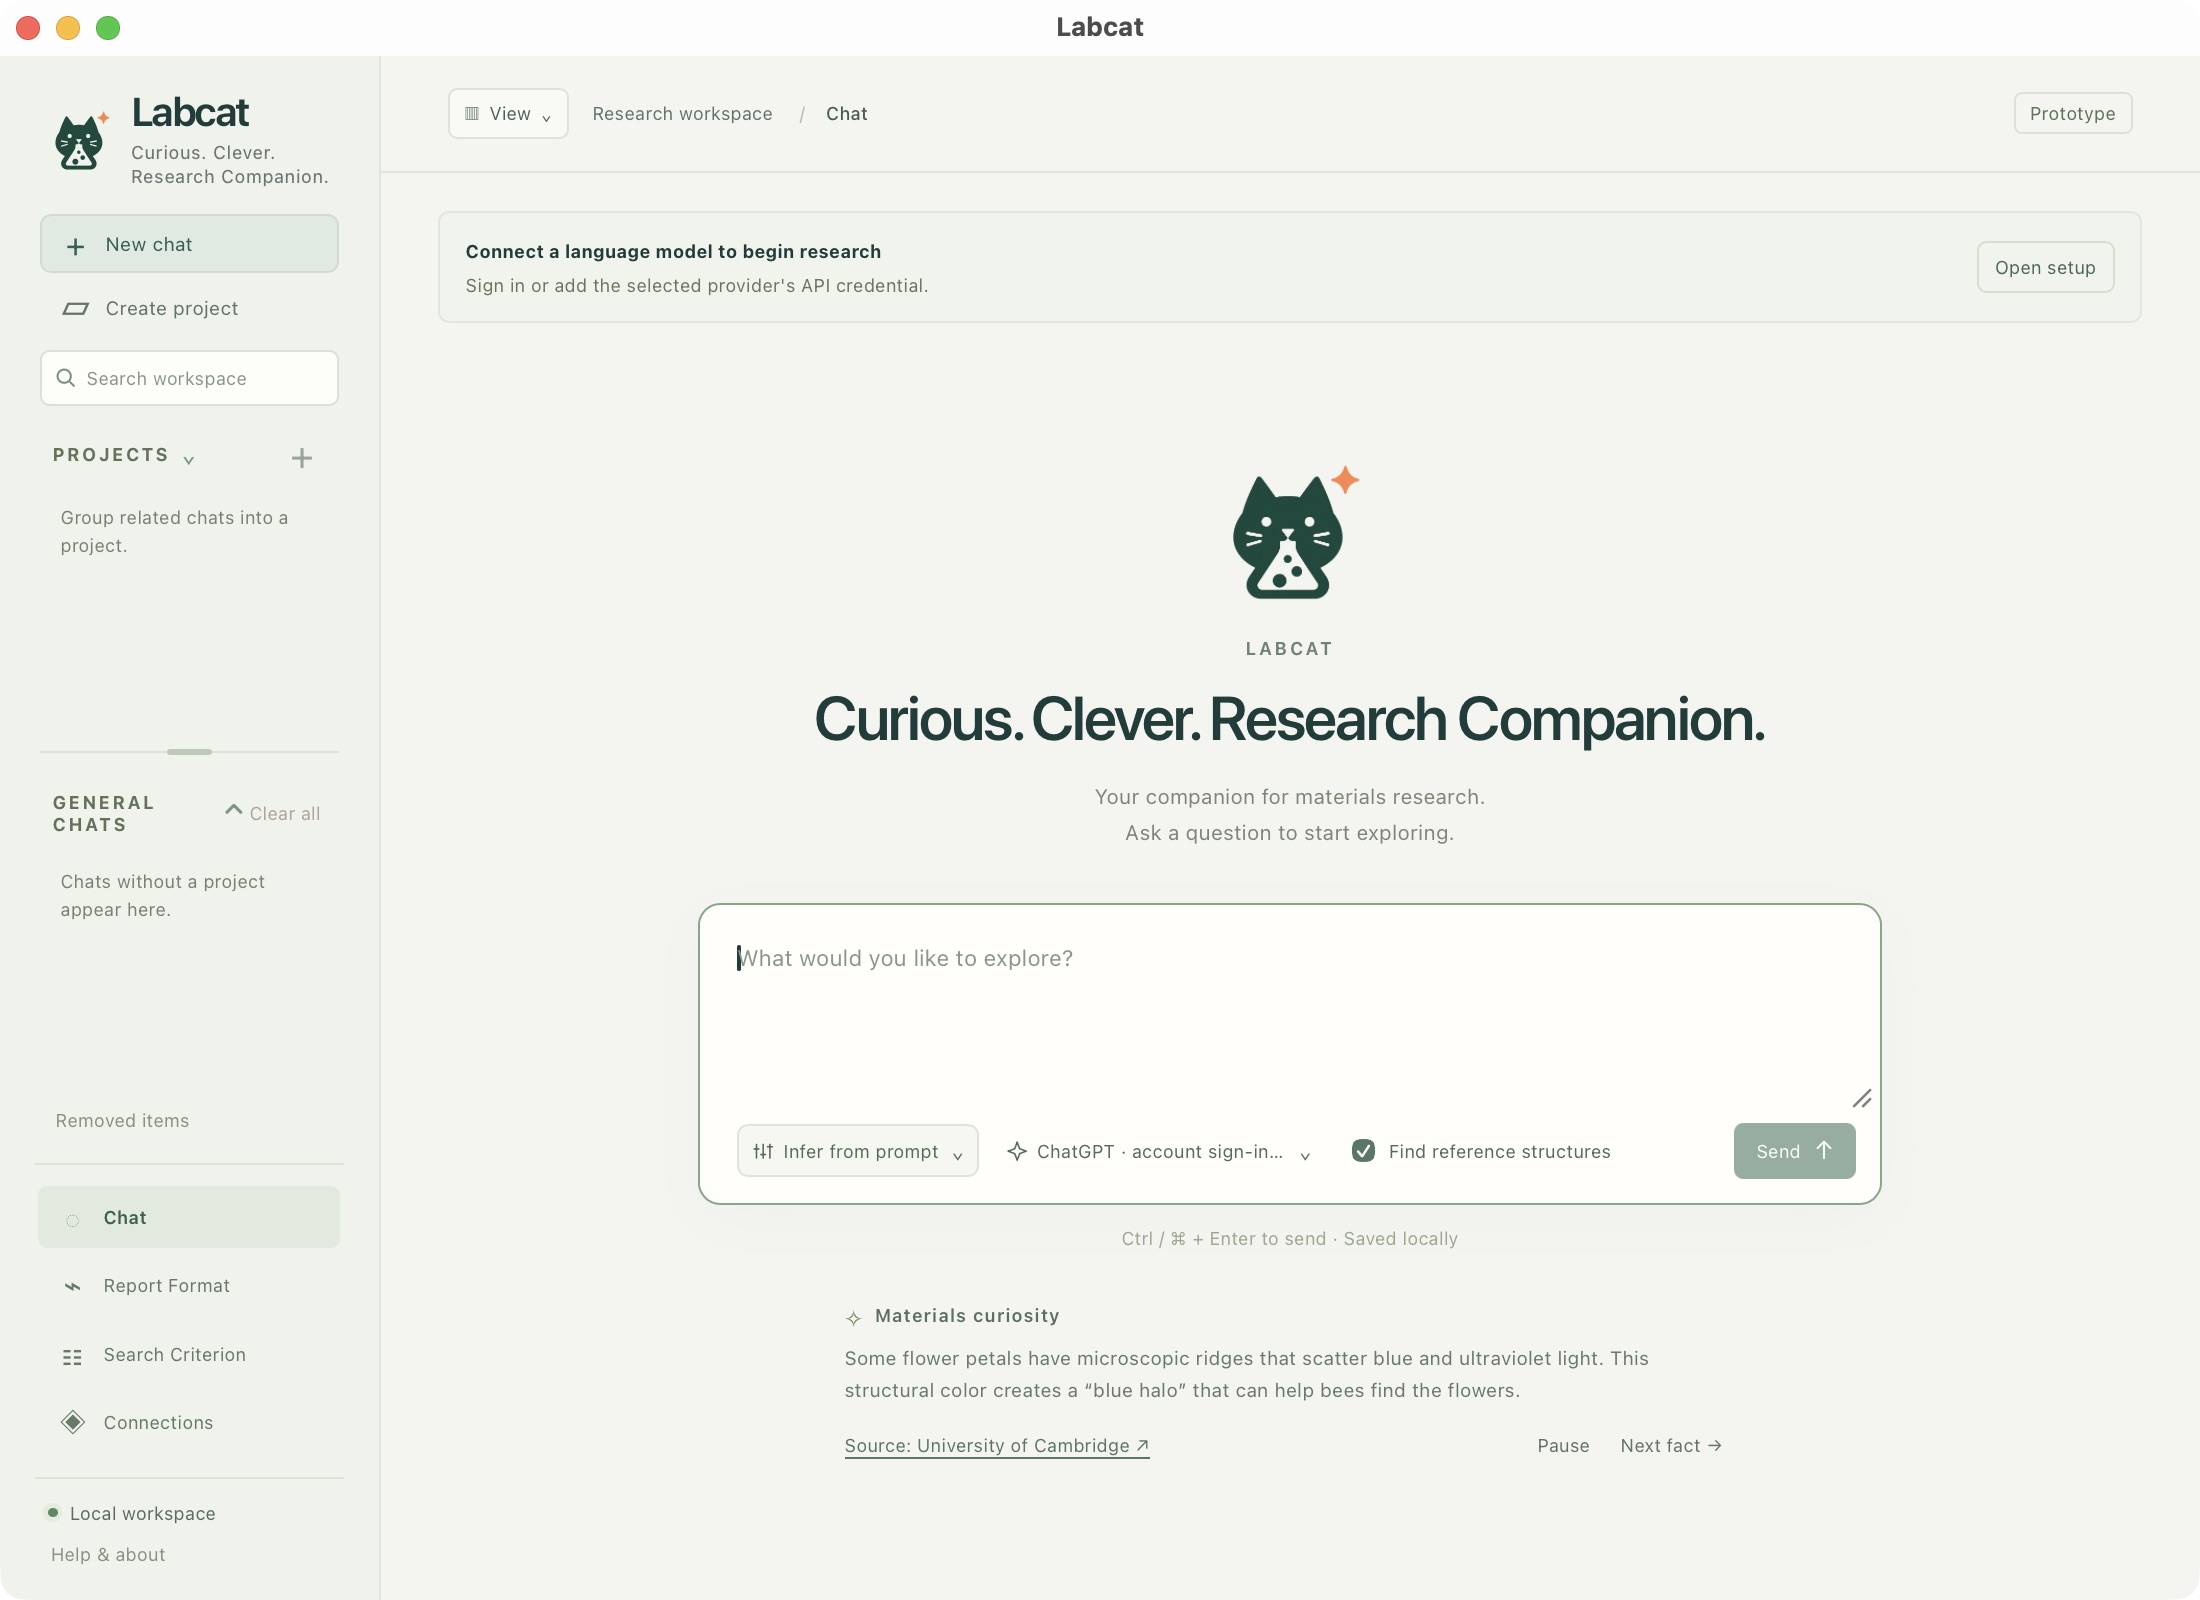
1. New chat. 2. Create project. 3. Search saved work. 4. Report Format, Search Criterion and Connections.
Paste this into the prompt box:
I need an oxide for a thin-film capacitor. Favor a high dielectric constant, but also compare band gap and room-temperature stability.
Leave Infer from prompt selected and Find reference structures checked. Check the model, then click Send, or press Command + Enter on Mac and Ctrl + Enter on Windows/Linux.
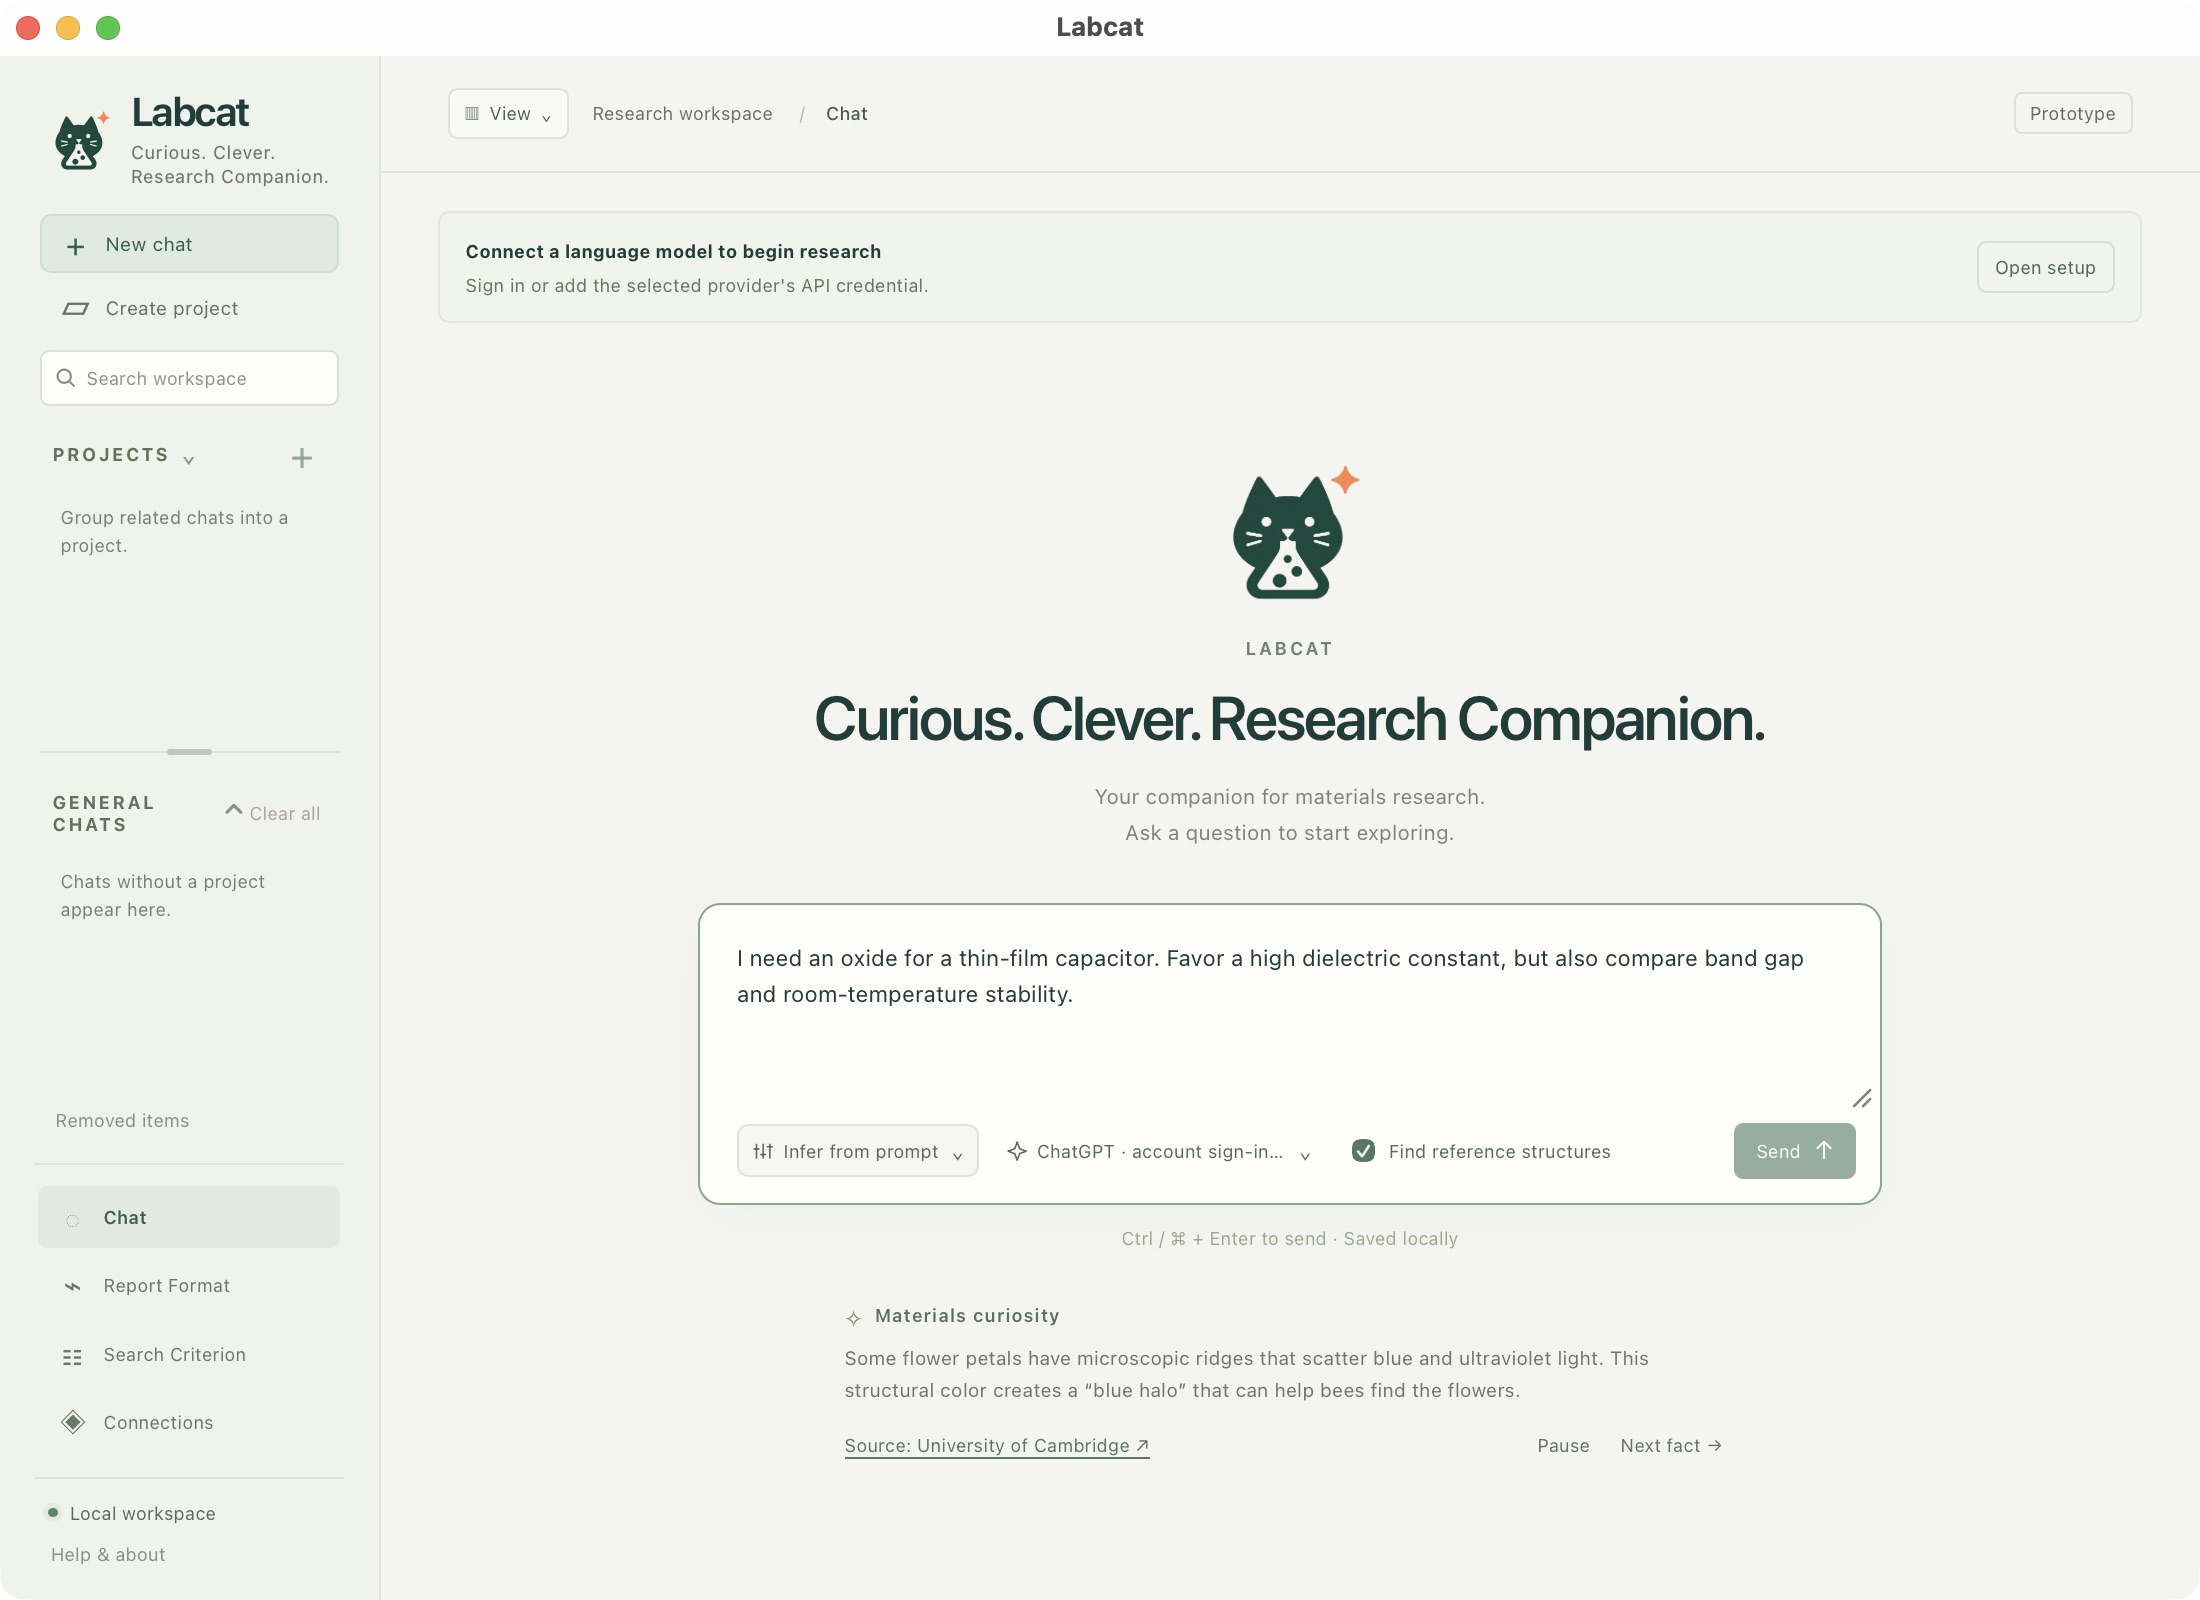
1. Write the research question. 2. Choose automatic or saved criteria. 3. Check model and reference-structure lookup. 4. Send after connecting.
If Labcat asks for clarification, reply in the same chat. Continue with the illustrated user guide to read, compare and export results, or try the examples.