Quickstart
Documentation notice
This documentation was generated with help from a large language model and has not been fully vetted by the developer. Verify critical details against the source code and current application behavior.
This page gives the shortest path from launch to first result.
1. Open the EWALD interface
From an activated EWALD environment, launch:
bash
ewald
The main window shows:
- Left file/project pane.
- Main workspace on the right.
- Tools for mask/PONI management and launchers on the menu/toolbar.
2. Create or open a project
- New Project: start from the
Filemenu. - Open Project: load an existing
.ewldfile.
Until a project is active, some actions are disabled.
3. Import data
In the project tree:
- Import Data File for one detector image.
- Import Data Folder for a set of TIFFs.
EWALD currently supports TIFF-based detector files (.tif, .tiff).
For each import, choose metadata strategy:
filename: parse from delimiter-separated tokenstiff-header: read embedded metadata if possibleyml(optional): load a metadata sidecar
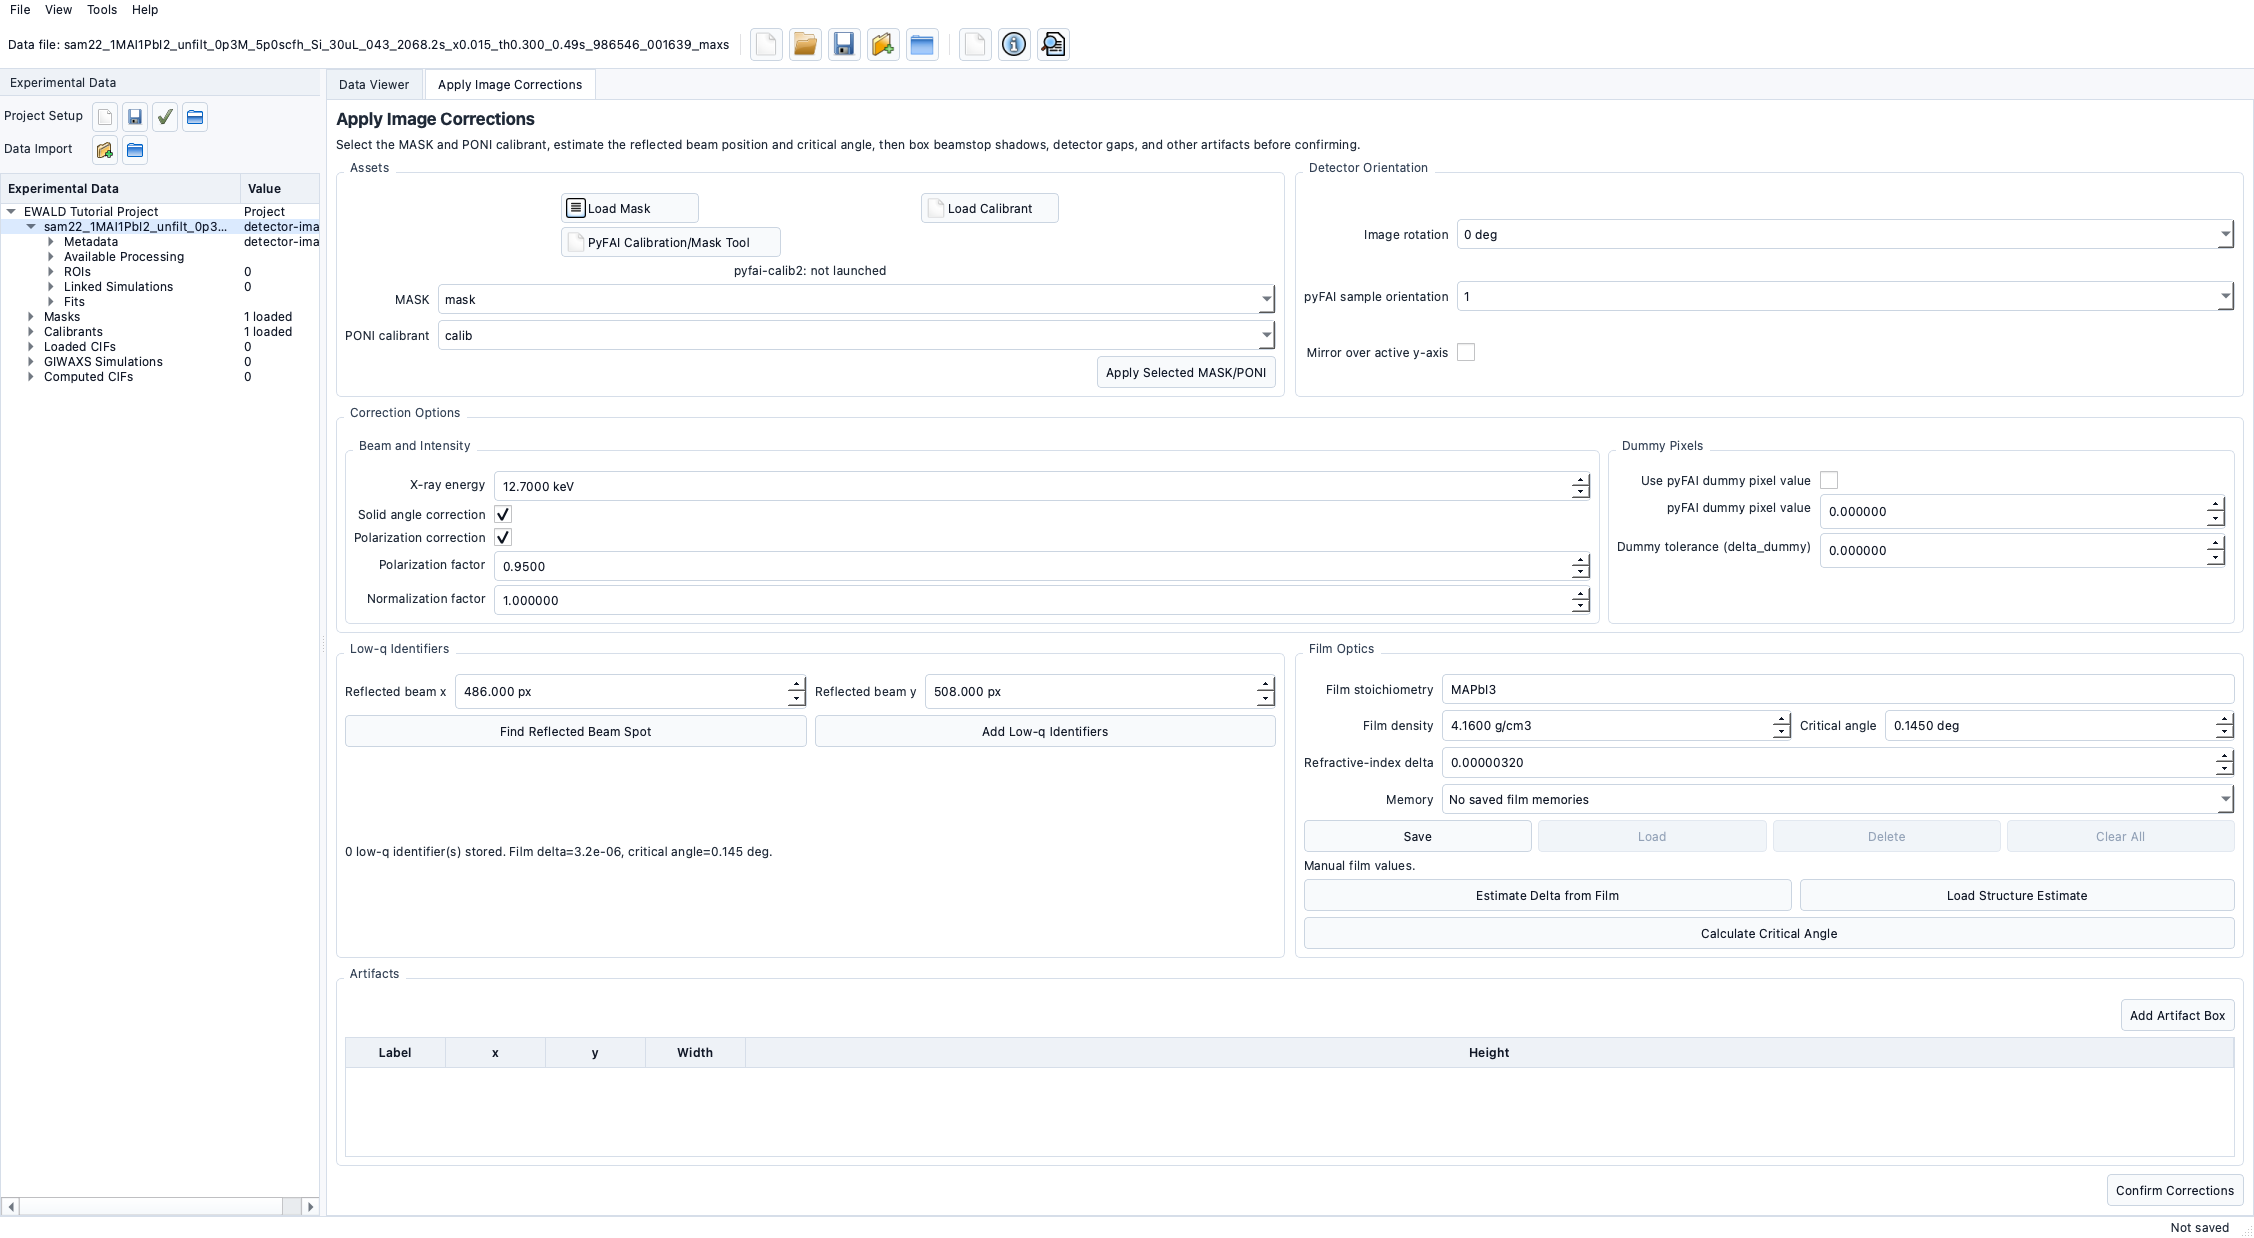
4. Apply basic calibration
With a selected data target:
- Open the Apply Image Corrections workflow controls.
- Select and load a
MASKasset. - Select and load a
PONIcalibrant. - Set the rotation/mirror controls if needed.
- Press Apply to stage and Confirm to unlock downstream tabs.
The downstream workflow remains gated until corrections are confirmed.
5. View GIWAXS data
In Data Viewer:
- Navigate the corrected image on
q<sub>xy</sub>/q<sub>z</sub>axes. - Adjust contrast, colormap, and quantile scaling.
- Draw and edit ROIs.
6. Create one ROI
Use the ROI toolbar:
- Add a rectangular ROI for
q<sub>xy</sub>andq<sub>z</sub>lineouts. - Add an arch ROI for azimuthal (
chi) extraction.
7. Run a basic fit
In Peak Identification:
- Manually place points or snap points to maxima.
- In Peak Fit, run fit on the selected ROI.
- Review
q<sub>xy</sub>,q<sub>z</sub>, and azimuthal trace fits.
8. Save/export results
- Save the project frequently (Project → Save/Save As).
- Project data is retained in
.ewld. - Pole-figure and simulation outputs can be exported from their respective tools.
9. Exit and continue
Use the same workflow repeatedly on additional data files or folders. Use the ROI table as the source of truth for geometry tags, fit links, and phase labels.
What is intentionally not complete yet
- Some advanced batch and automation workflows are still flagged as Planned or Experimental in the relevant feature pages.